No Sew Chair Back Cover Tutorial
Honestly, I only recently started changing my home decor for each season. But this is one holiday item that I am anxious to make for other seasons. It’s easy and it makes a big impact. My house is small, so even the small things make a difference.
I am always looking for easy DIY projects. This no-sew chair back cover is just the ticket. You can of course use the same process if you would prefer to sew these covers, but I opted for fabric glue.
Choosing fabric is so fun, but can be a little overwhelming. The choices are endless. I prefer a heavy cotton so it holds up well but is easily washable. You want to be sure to wash your fabric before you begin to account for any shrinkage. I have become a huge fan of online fabric stores. They have so many choices and you can shop in your pajamas!
Lets get started!
Materials
- Fabric – I used about 1/2 yard for each of my dining room chairs
- Fabric glue – If you plan to wash your chair covers be sure to use permanent fabric adhesive
- Small paint brush – I used a small paint brush to apply the fabric glue (along with my finger toward the end).
- Coordinating ribbon
- Fabric scissors
- Cardboard – I used cardboard to make a template (optional)
- Measuring tape and yardstick
- Fabric chalk or marking tool
- Iron
If your fabric has a repeating pattern, you’ll need to buy extra if you want a certain part of the pattern to appear in the center of the chair. For smaller patterns, this is not important, but it could be for a toile or larger fabric patterns.
I use affiliate links so I can afford to keep doing this. Hope it saves you time. See my disclosure policy.
Step-by-Step Tutorial
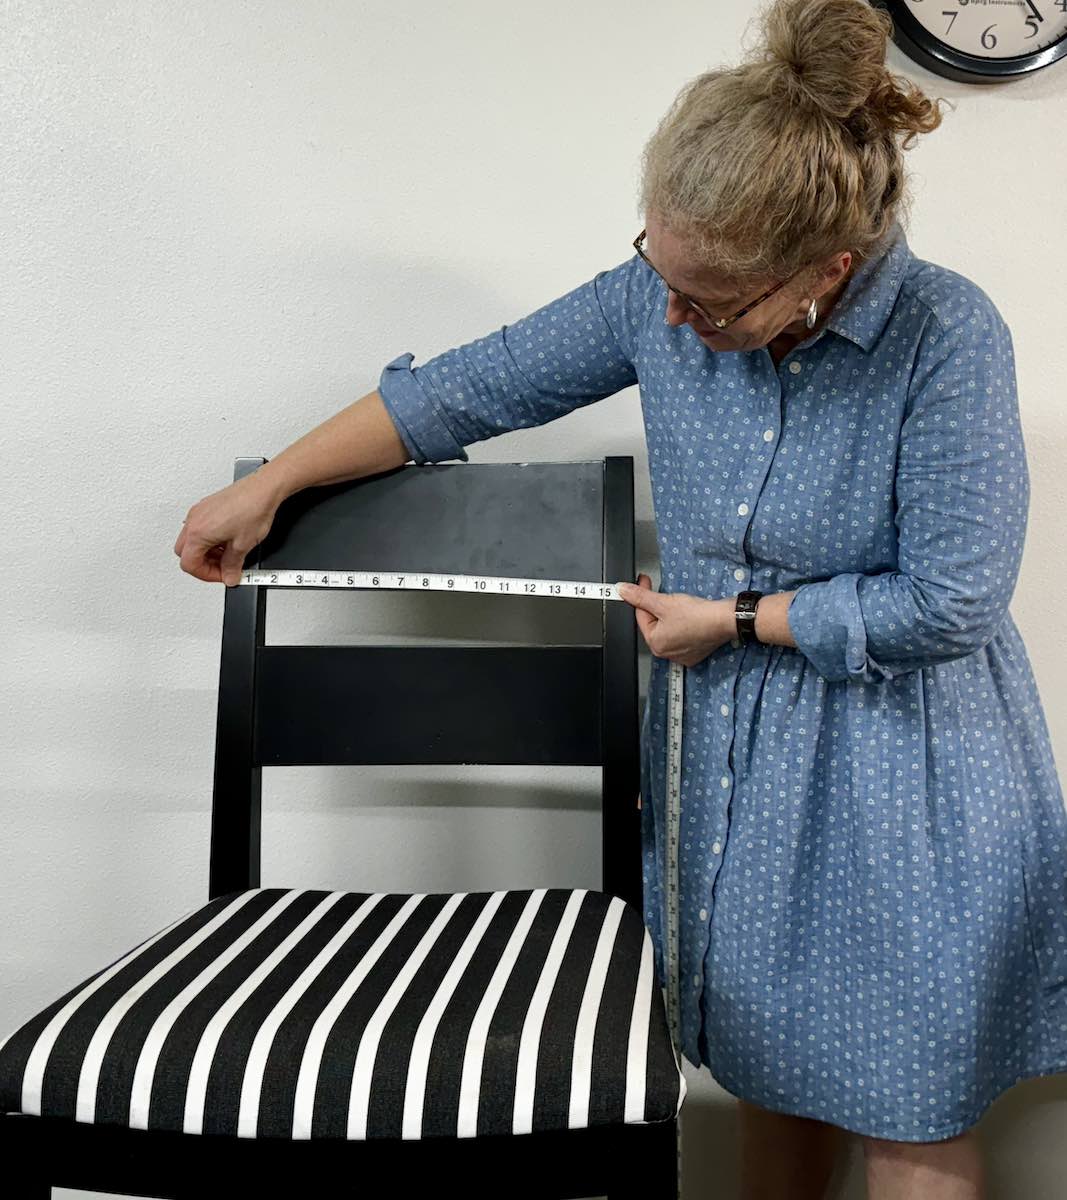
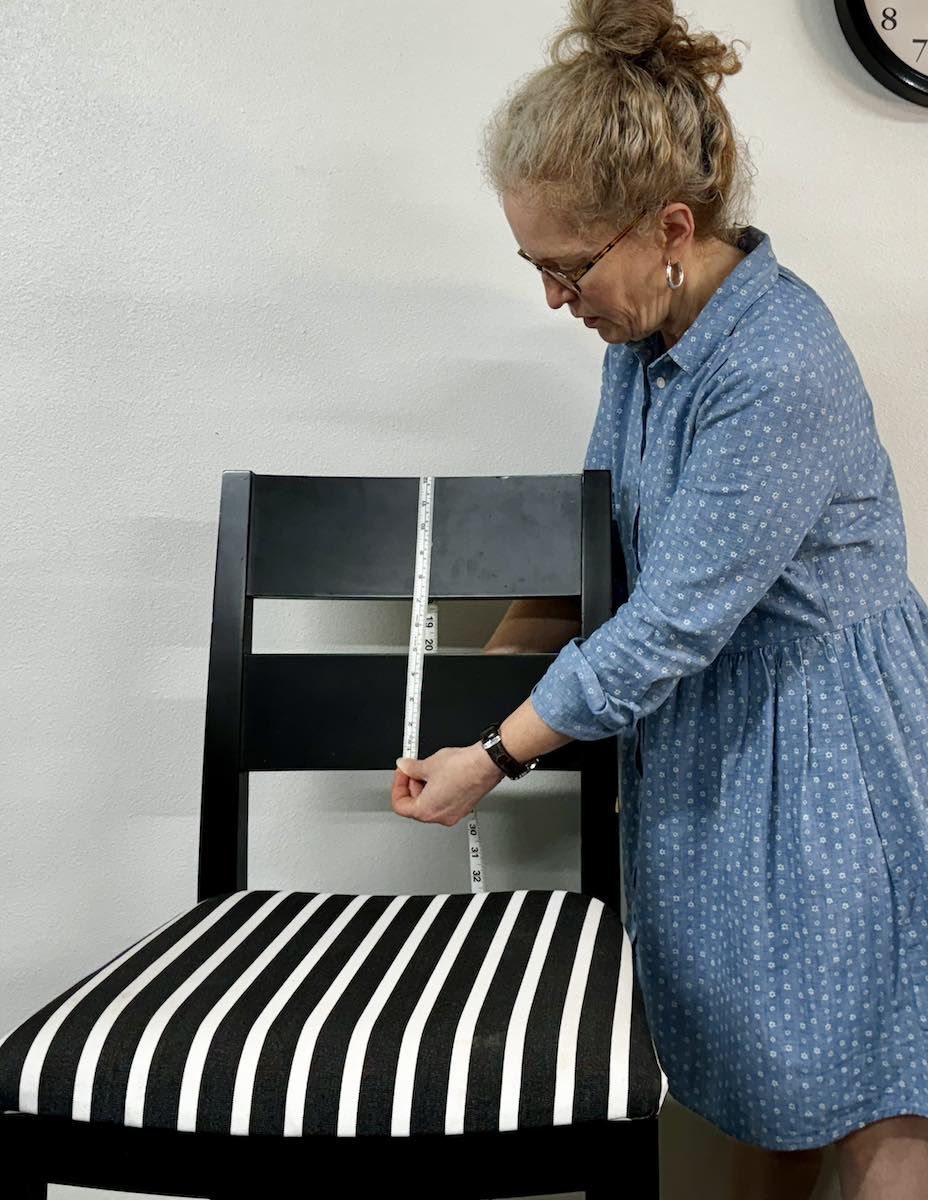
The first step is to measure the part of the chair you want to cover.
I made covers for the back of my dining chairs. Using a tape measure, measure the height & width of the chair back. You will want to add 3 inches to each measurement to account for the hem.
For example, If your chair is 16 inches wide, you’ll want the width of your fabric to be 22 inches. If the length of the cover is 12 inches times two (for each side), you’ll want the length of the fabric to be 30 inches (12 x 2 + 6).
Cut the fabric panels. For my chairs each panel is 22″ x 30″,
Next, lay your fabric on a flat surface. Use a yardstick to measure the dimensions. Don’t forget to add 3 inches to your measurements to account for the hem you will create. You can create a cardboard template to use for cutting your fabric if you prefer.
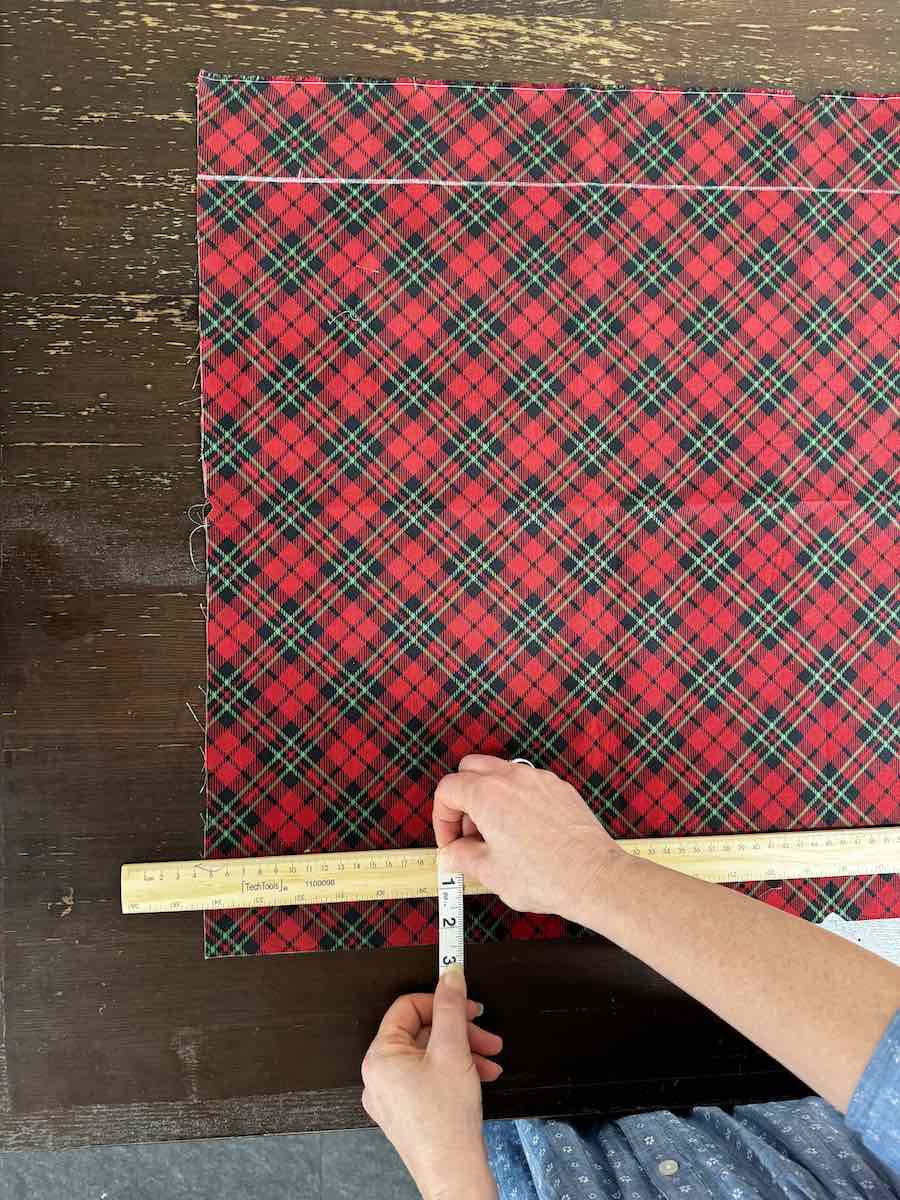

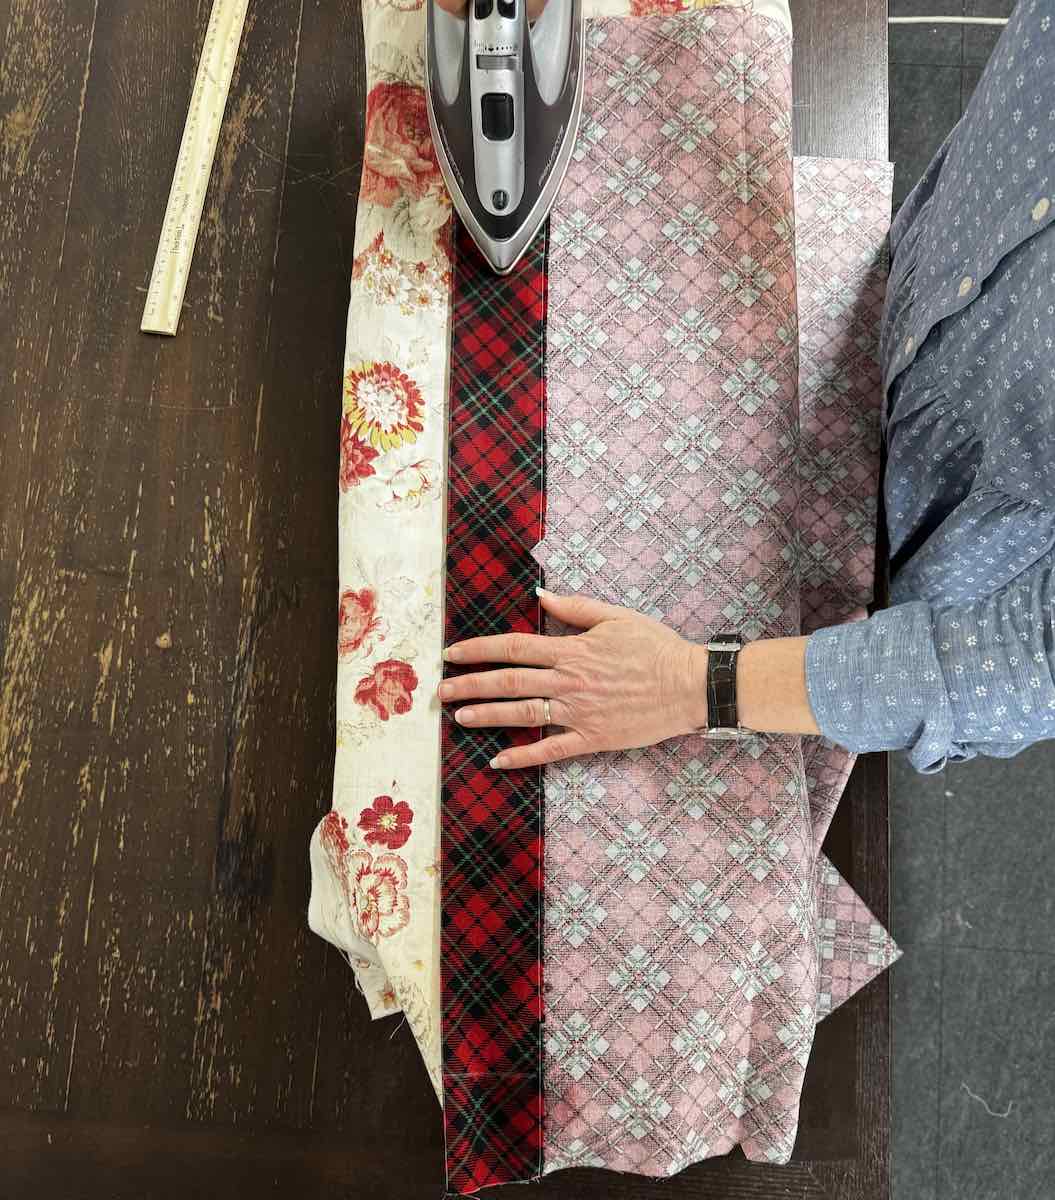
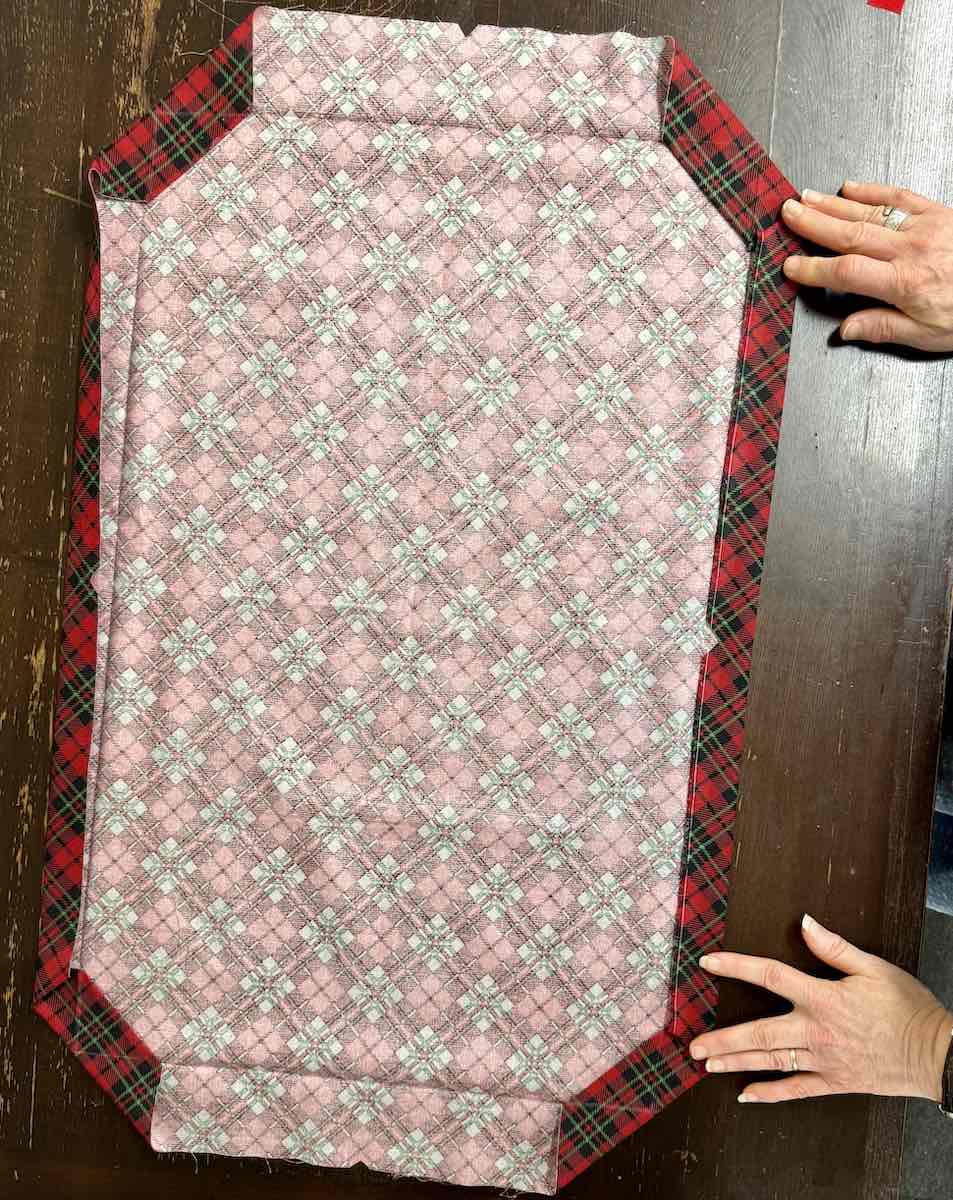
Press a 3-inch hem to all 4 sides. This crease will help you see where to fold the hem up when you flip the fabric over.
Fold each corner over to the 3 inch press line & adhere with fabric glue. Fold each corner over on itself again and adhere with fabric glue.
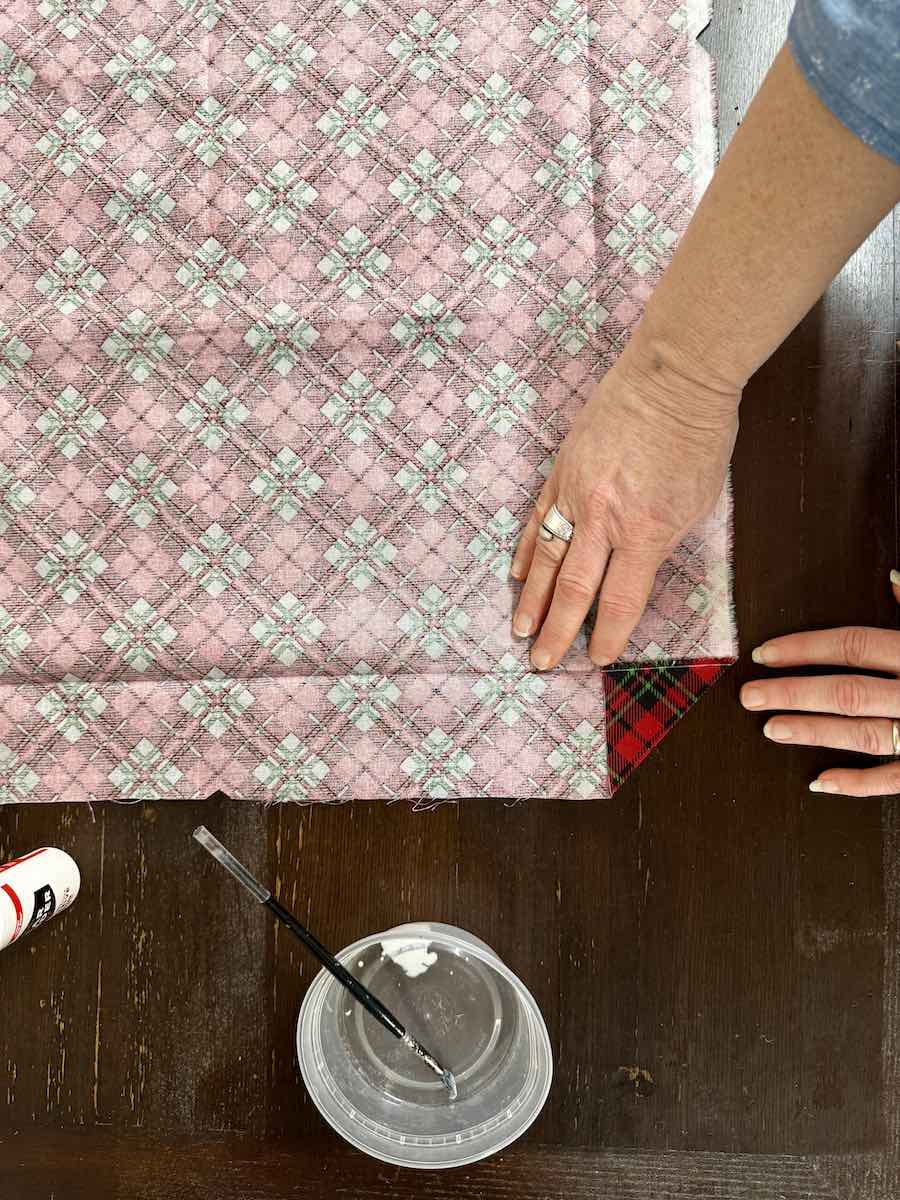

To hem each side, fold the raw edge over 1.5 inches and glue, then fold each edge over on itself again and apply more fabric glue. This second fold will take you to your 3 inch press line.
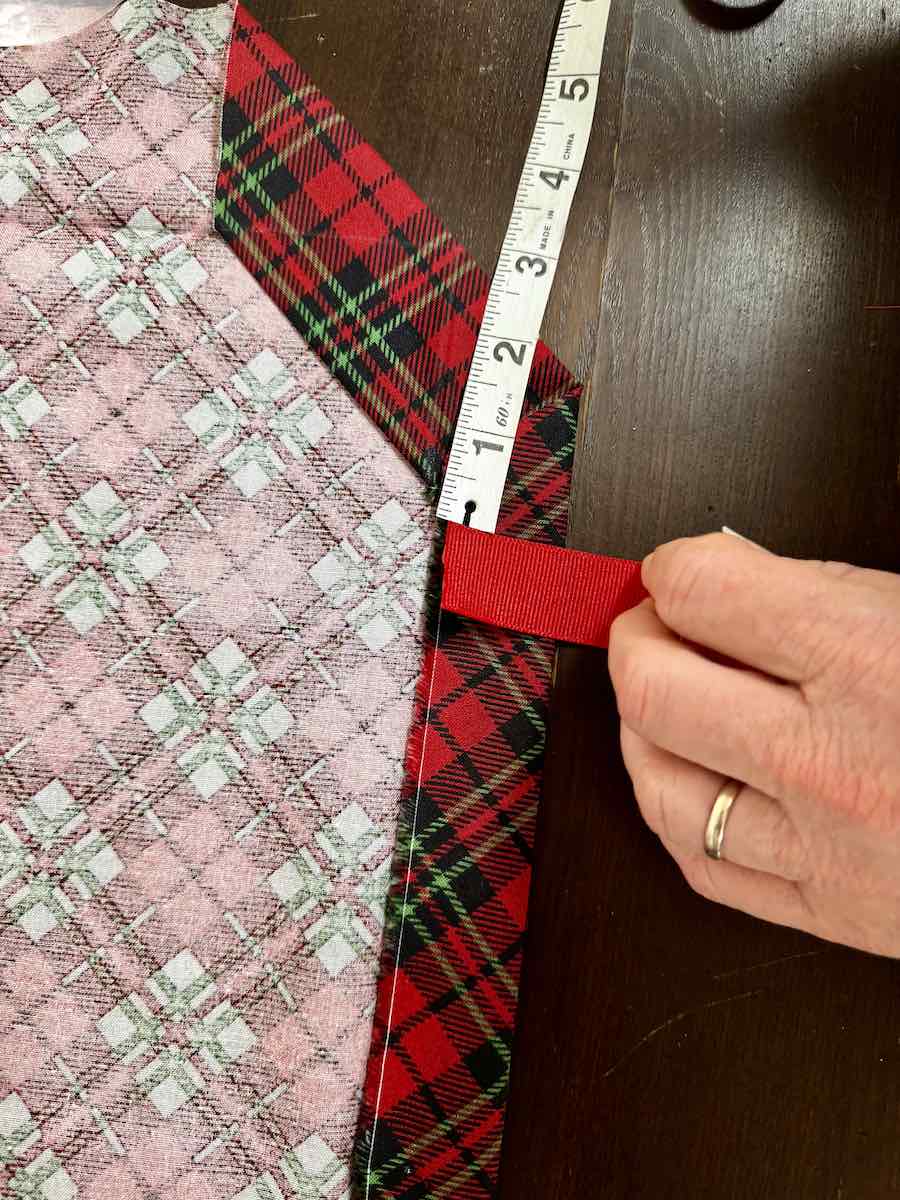
- Add ribbon. The ribbon is used to hold the chair cover in place. Before you cut the ribbon look at the depth of your seat back. If it’s an inch, 3 inches of ribbon will give you enough space to glue the ribbon under your seam and enough room to slide the covers on and off easily. Cut 2, three-inch pieces of ribbon for each cover.
- Measure 3 inches up from the corners on the long sides of the chair cover.
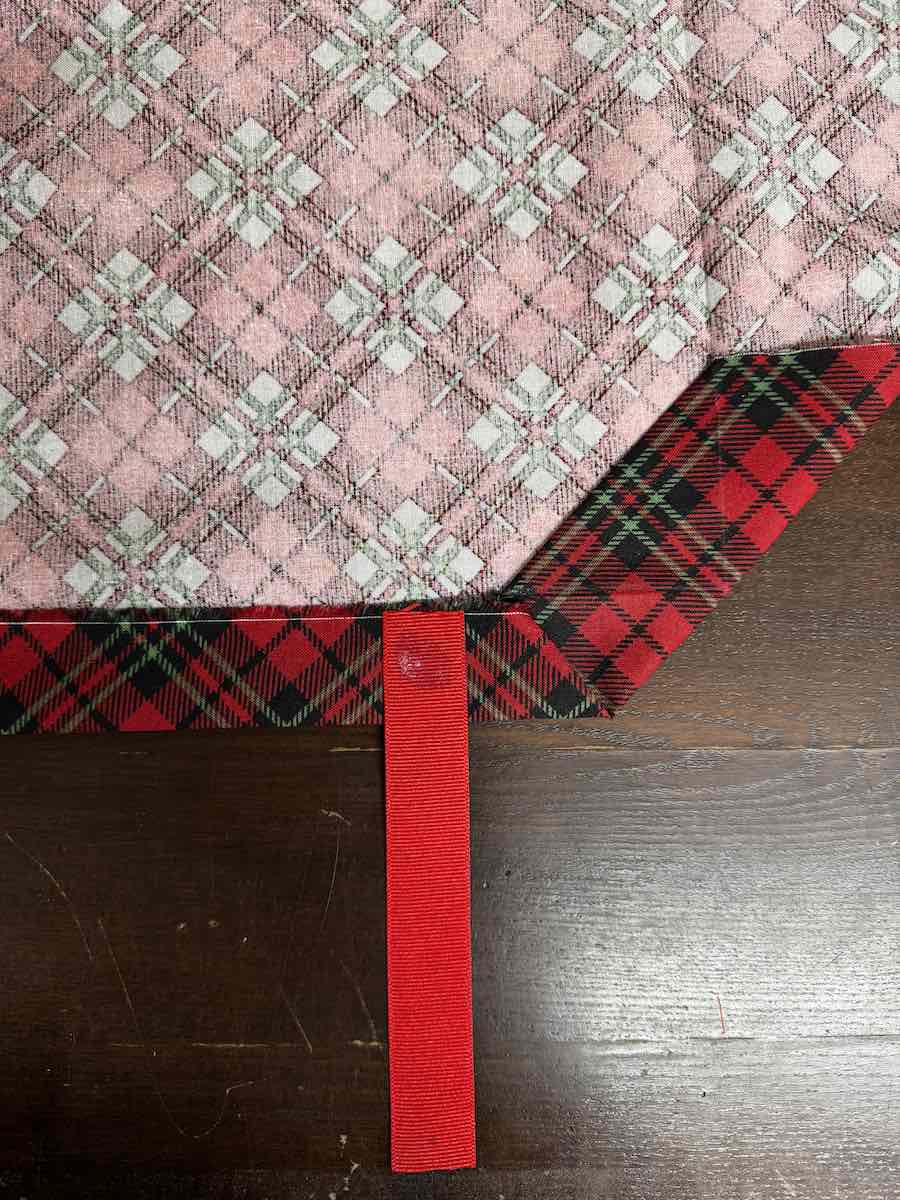
- Use fabric glue to adhere the ribbon under the hem at your 3 inch mark then fold the chair cover right sides together and glue the other end of the ribbon under the hem on the other side. Repeat this step for the other side.

Turn the chair cover right side out and slip it over the back of your chair. I liked them so much I made them in a thick white fabric, too.


What I Learned After Making These
Using permanent fabric adhesive is a must if you plan to wash your chair covers. I had trouble with the ribbon coming loose when I washed mine and ultimately ended up adding some stitches to the ribbon to make them more durable.
Of course, you always have the option of sewing the hems and ribbon in place instead of using glue. This would be fairly easy to do, since there are only a few straight seams needed.
I hope this gives you an idea of how you can make something to change up the look of your dining table even if you don’t like to sew. easily change your home decor for any season!
If you liked this you might like how to make covers for your dining room chairs and how to make reversible napkins (which is a great thing to do with leftover fabric).


