Basket Liner Tutorial: An Easy DIY
Welcome to this DIY tutorial on creating your own basket liner. Whether you’re looking to enhance the functionality or add a personal touch to your wicker baskets, sewing a fabric liner is a fairly simple process.
These basket liners can be customized for any occasion or holiday and are an easy way to personalize a gift basket. By following these step-by-step instructions, you’ll be able to make a reversible custom basket liner that suits your style and perfectly fits any size basket.
Since it’s reversible you can make one side that works for the holidays and the other side for everyday use. Now, let’s get started!
Materials Needed:

- Wicker basket (using a basket with square edges instead of sloped sides is easier)
- Fabric (cotton fabric works well). I am using 2 different fabrics so the liner is reversible. You should wash the fabric before you begin so it will shrink before you make your measurements.
- Rotary cutter or scissors
- Sewing machine
- Chalk, pen or fabric marker
- Measuring tool
- Straight pins
- Ribbon
- Thread
- Butcher paper or a paper bag
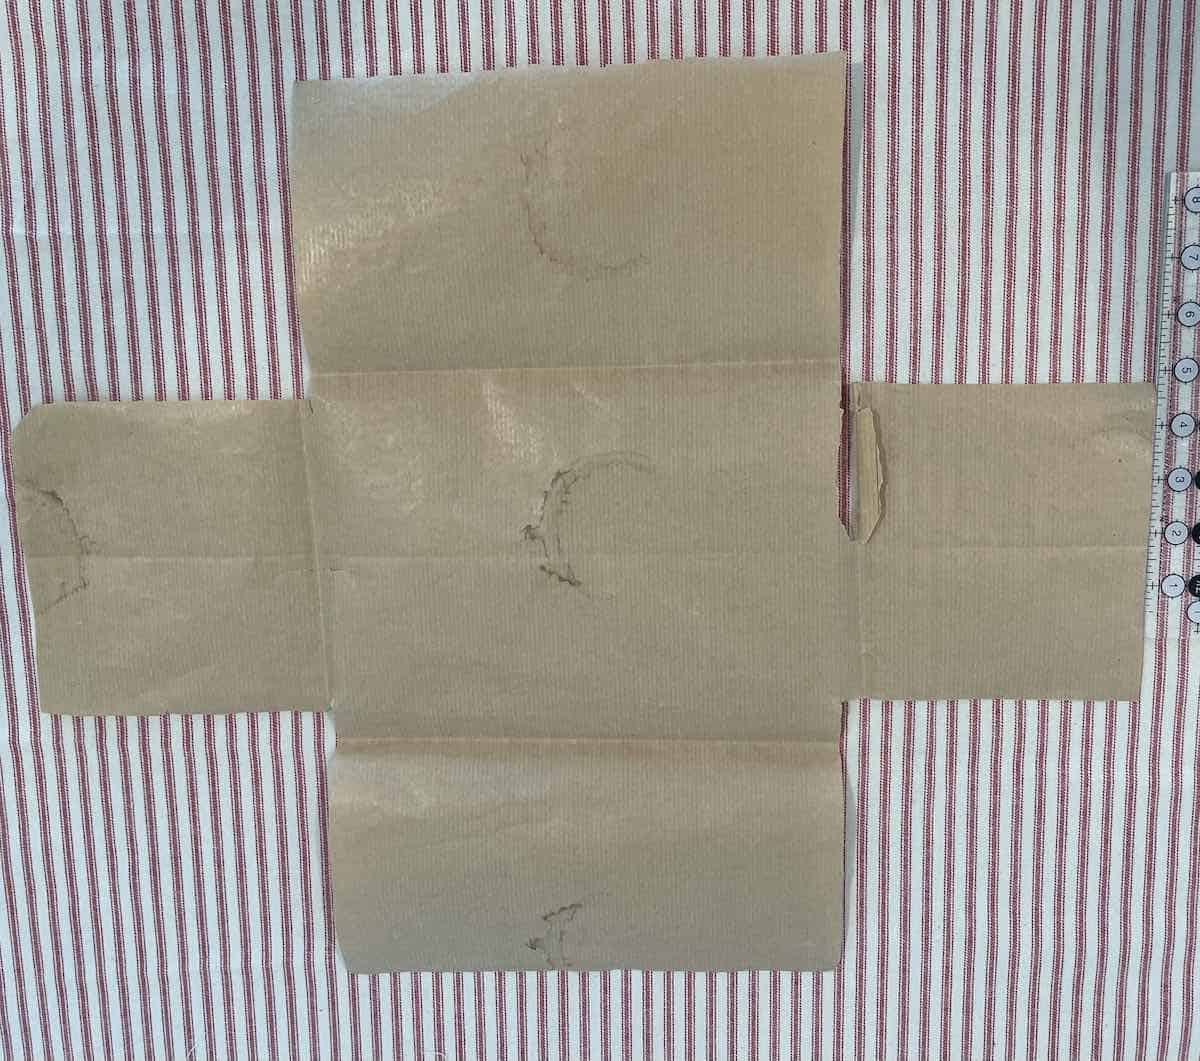
Step 1: Make a Template
- To make a template you can use butcher paper or a paper grocery bag.
- Place the basket in the center of the paper and start by tracing the outline of the bottom of the basket.
- Turn the basket on one side and trace the outline of that side, being sure it is lined up with the tracing of the bottom. Trace the edges of the basket for all four sides.
- You will end up with a template that looks like a “plus sign”.


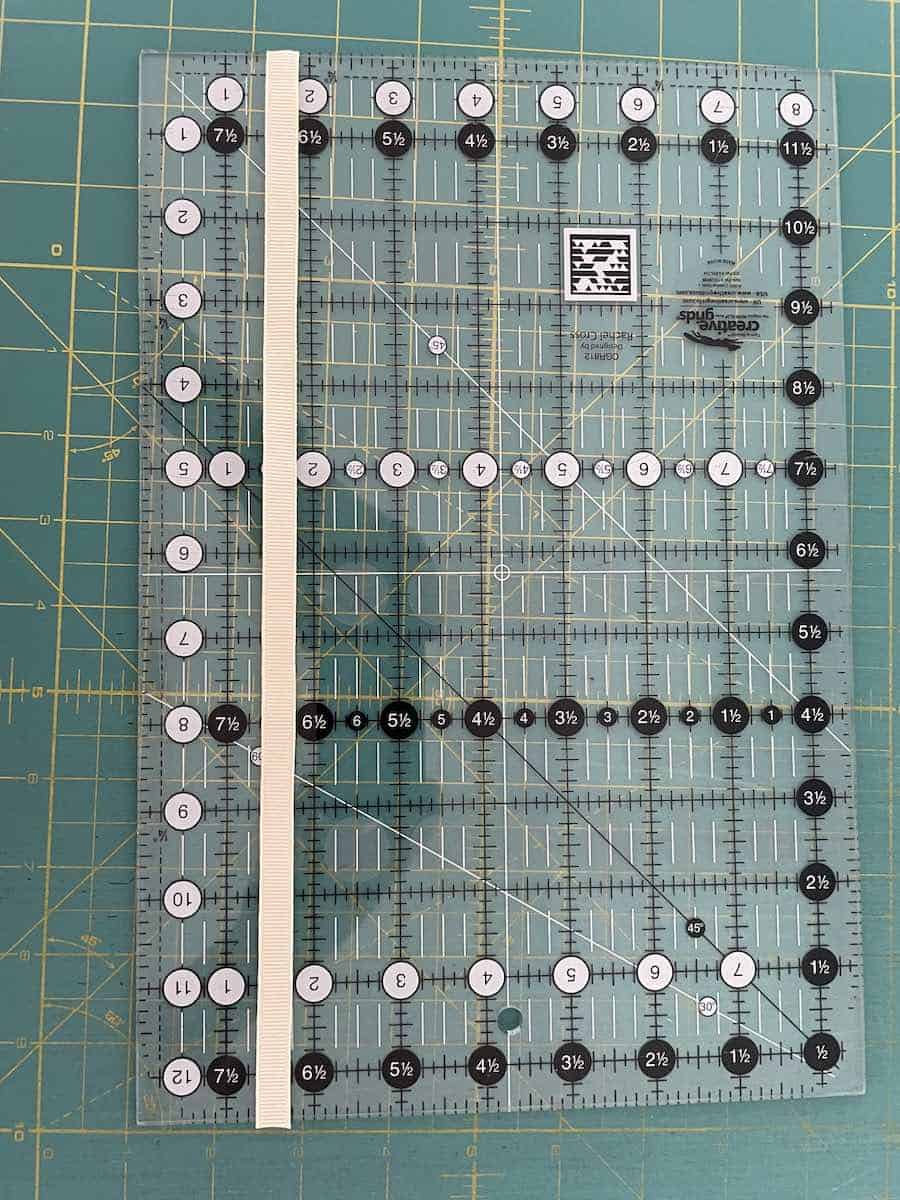
Step 2: Cut the Fabric
- Place the template on the “wrong side” of the fabric. You will need to measure 1/4 inch outside the template on all sides to account for your seam allowance. If you prefer you can use a half inch seam allowance, just make sure you add that half inch to the template before cutting your fabric.
- Add at least 3 inches to the ends of all four sides to make the flap pieces long enough to overhang the sides of the basket. You can make basket side pieces longer if you like.
- Repeat this step second fabric. Remember this is a reversible fabric basket liner so you will have 2 identical pieces of different fabric.

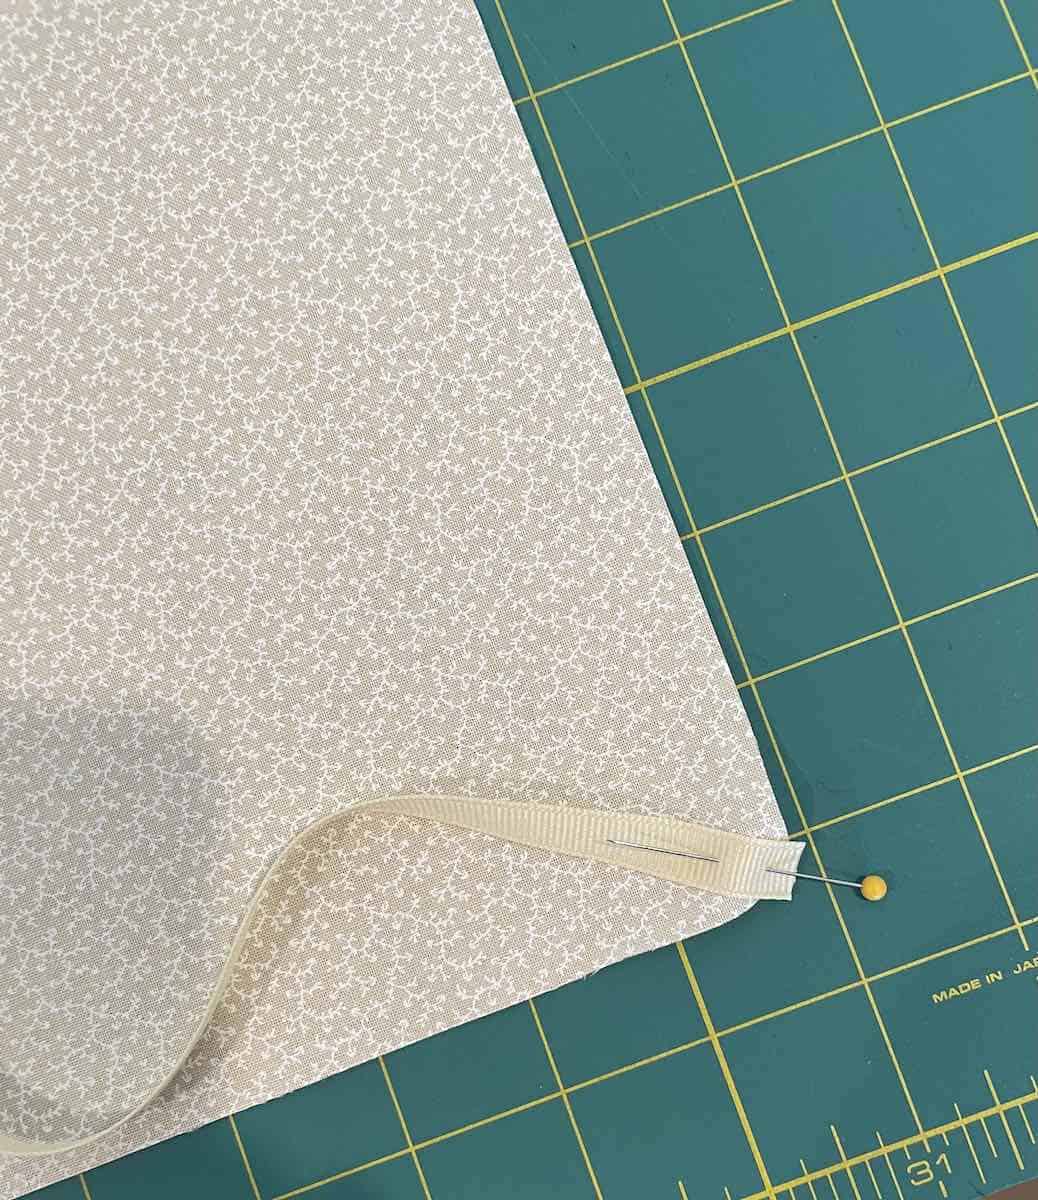
Step 3: Cut and Pin the Ribbon in Place
- I am using ribbon ties at the corners of my basket.
- Cut 8 pieces of ribbon. They need to be long enough to tie at the corners of the basket. I cut mine 12 inches in length.
- With a straight pin, fasten one piece of ribbon to each corner of the fabric. Pin the ribbon to the corners on the right side of one of the fabric pieces.
Step 4: Pin the 2 Pieces of Fabric Together
- After you have pinned the ribbon in the corners, place the second piece of fabric on top of the first.
- The fabrics should be right sides together.
- The ribbon will be on the inside, between the 2 pieces of fabric.
Step 5: Sew the Basket Liner
- Using a 1/4 inch seam allowance sew along each side, removing the pins as you go.
- Make sure you catch each ribbon in your stitching at each corner.
- Leave one end open so you can turn the liner inside out.


Step 6: Turn the Basket Liner Right Sides Out
- Turn the basket liner right sides out. You can use a chopstick to get the corners crisp.
- Pull the ribbons to the corners.
- Press the basket liner.

Step 7: Sew the Open End Closed
- Press the raw edge of the open end under and sew as close to the edge as possible.

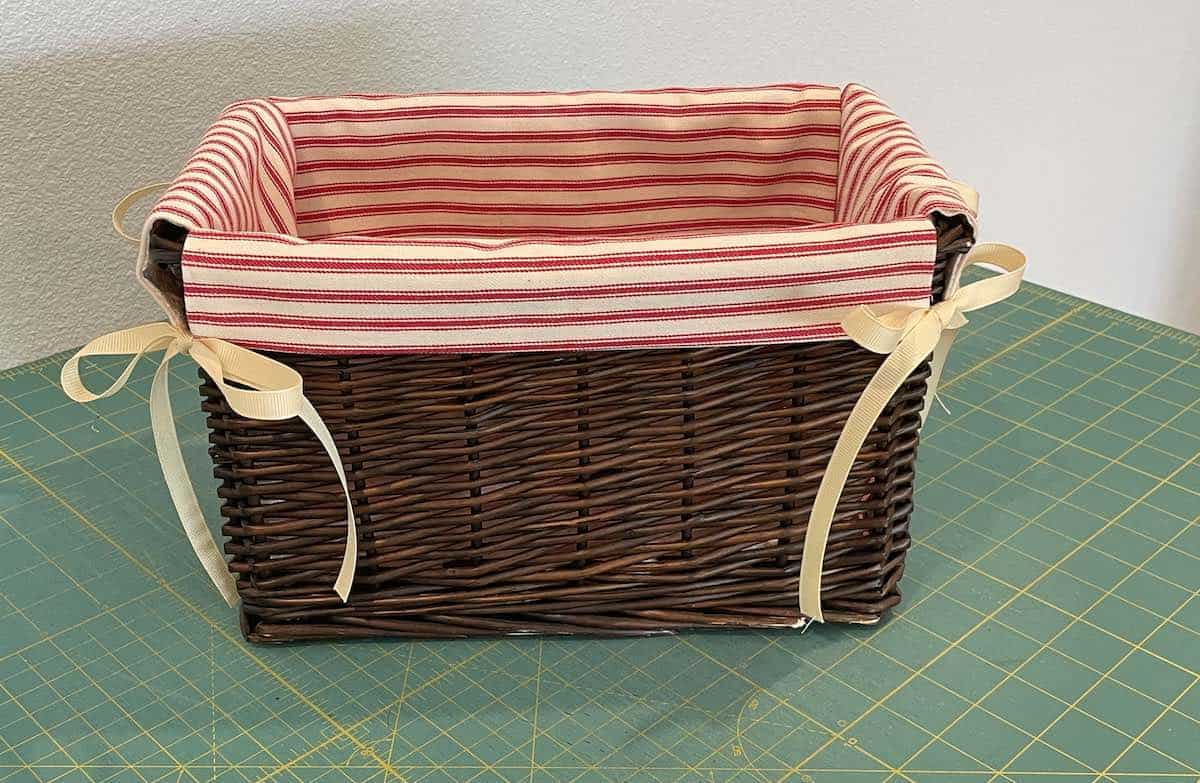
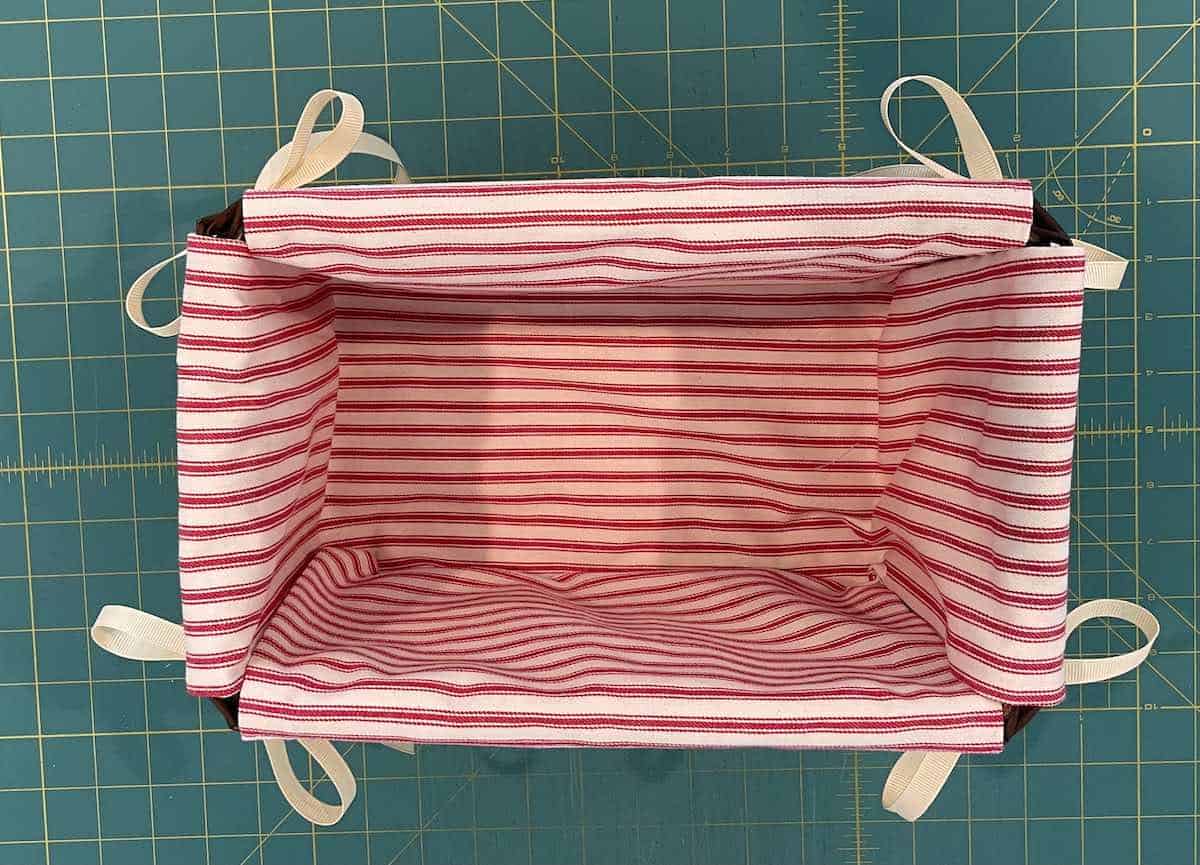
Now all you have to do is place the liner in the interior of the basket and tie the ribbon at the corners. Congratulations! You’ve successfully created your own DIY basket liner. Happy sewing!

I use affiliate links so I can afford to keep doing this. Hope it saves you time. See my disclosure policy.
If you liked this post, you might like how a reversible napkins in ten minutes and how to make a table runner.


