Refinish Wood Furniture Without Stripping It – The Perfect Beginner Up-Cycle
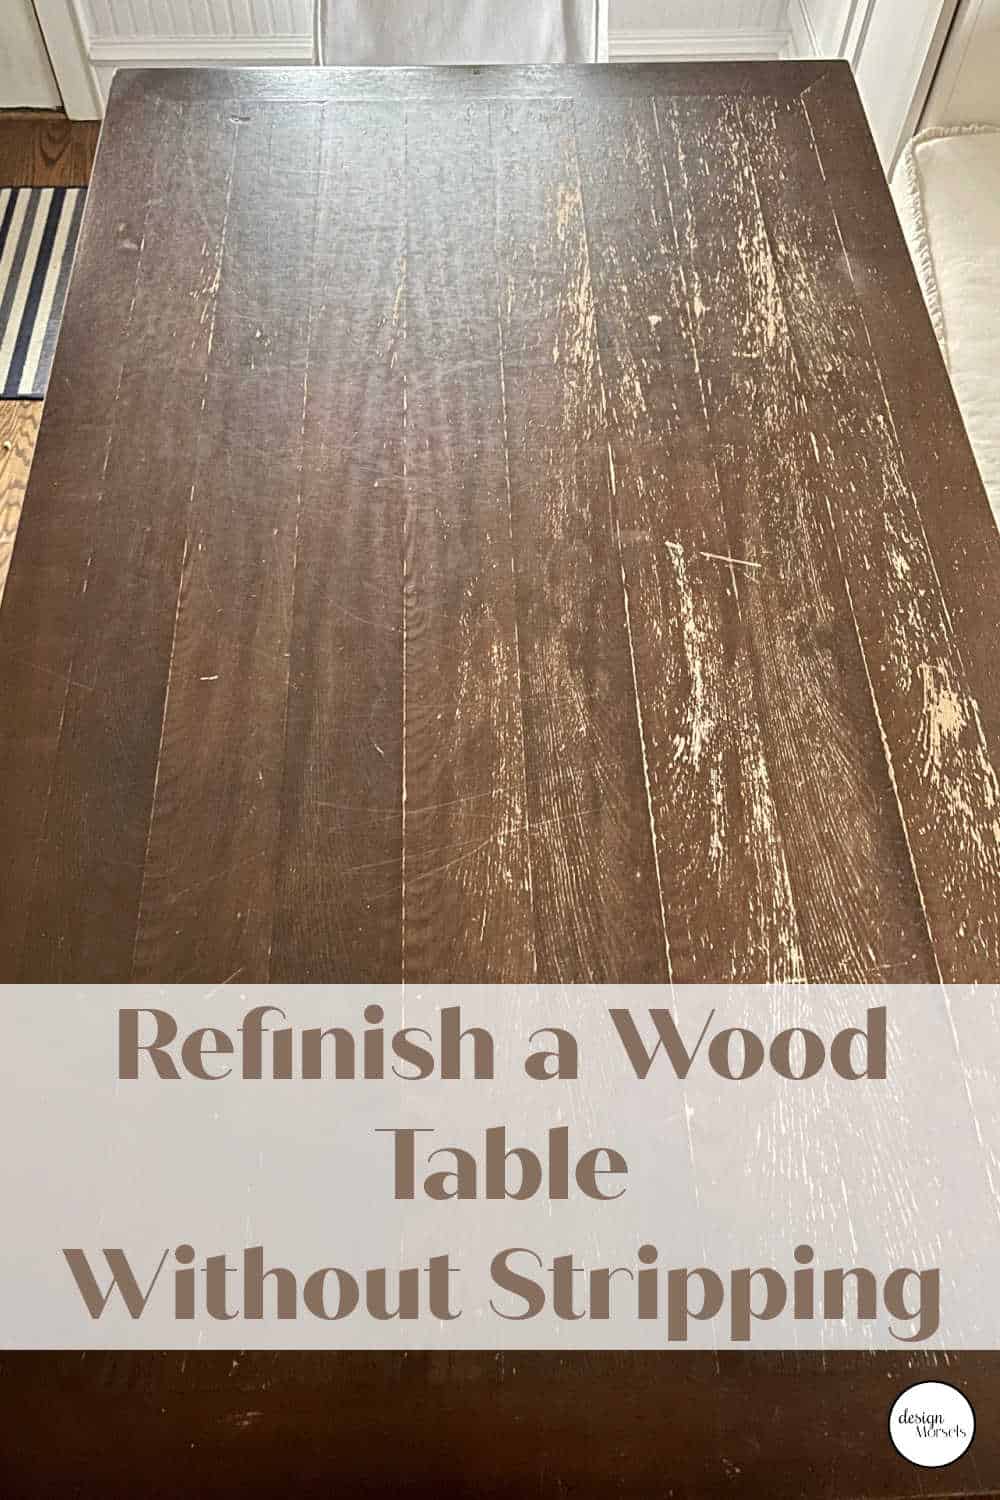
Updated for 2022: Do you have a damaged furniture piece that you’d like to bring back to life? I have a table that’s been in my sister’s garage for several years. Wooden furniture can get damaged if left in a warm humid place. I researched the best way to restore wood without using mineral spirits. Chemical strippers are pretty toxic and I wasn’t ready for that kind of project.
My motto when it comes to up-cycling wood furniture is that it must be quick and easy. I like saving a family heirloom from the landfill, but I don’t want to spend an entire weekend on any furniture restoration project. The easiest way to restore wood furniture is to sand and stain it.
Before you decide to invest time into an old piece of furniture, be sure it’s a piece that you WANT in your home. This table can transform from a rectangle to a square. It’s perfect for large sewing projects when you don’t have a big space. It’s definitely worth saving.
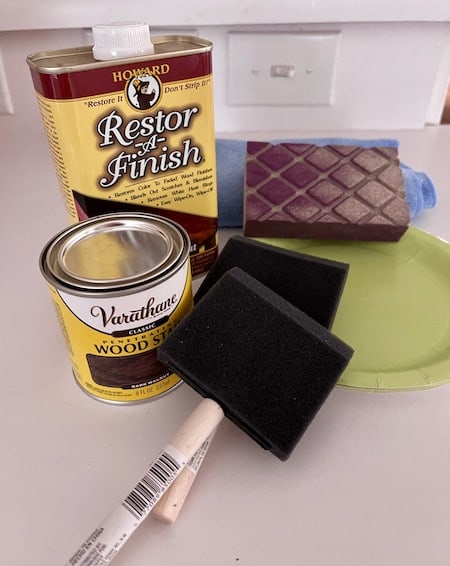
Supplies Needed to Refinish Wood Furniture
You could use wood stripper, but it’s stinky. Stripping furniture is also more of a time commitment than I’m willing to commit to. Instead, I opted to rough up the finish with sandpaper and fresh stain.
This post contains some affiliate links for your convenience. Click here to read my full disclosure policy.
- Sandpaper block – I used a 220 grit sanding block because it’s easy to hold. If you have a sanding machine you could do a much more thorough job.
- Varathan Classic Walnut stain – If the stain you use doesn’t match the existing stain exactly, you can stain the entire top of the table.
- Howards Restore-A-Finish – I used walnut
- Wood Markers
- Tack cloth to remove all of the dust and another clean cloth to wipe off any excess stain
- Sponge brushes
- A paper plate to hold the Restore-A-Finish
If you’re new to staining furniture, this is a project that beginners can easily tackle. I haven’t done much wood staining myself, but it’s very quick and easy to do.
Steps to Refinish Wood Furniture
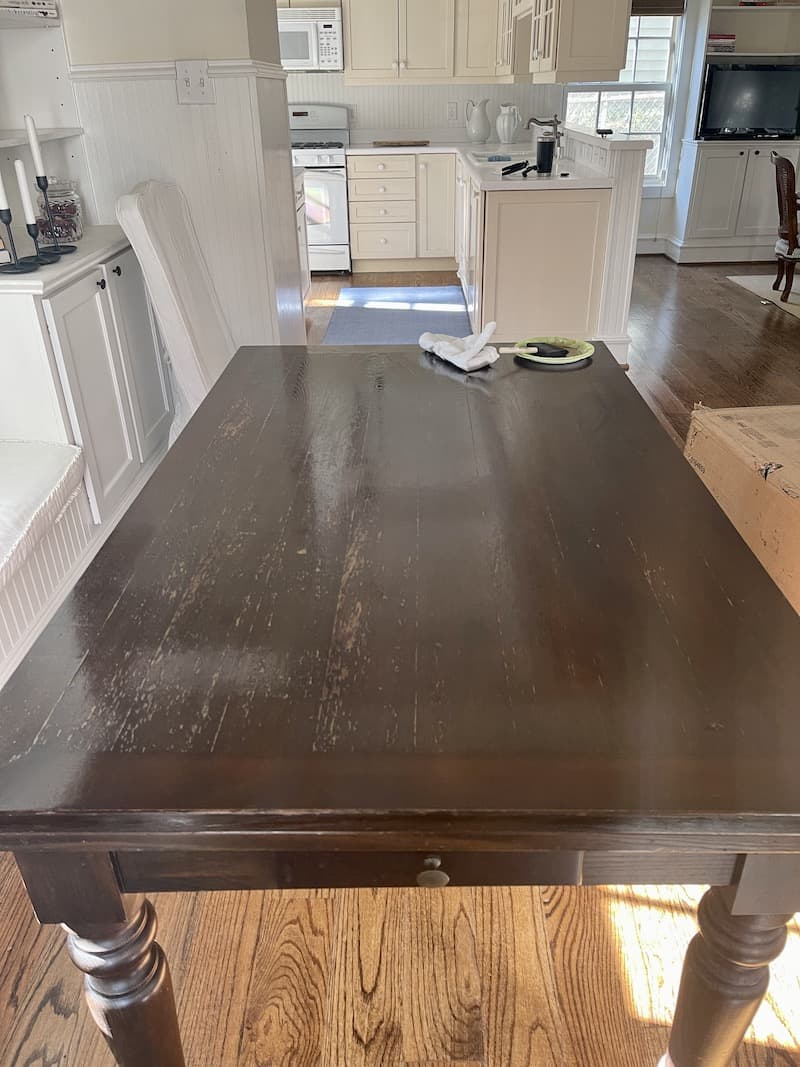
Refinishing this table took longer than I expected. After my first round of sanding and staining, I wasn’t happy with the table so I did a second round and the results were better. It depends on how damaged the old finish is and how deep the scratches are.
Step 1 – Sanding – The first step is to lightly sand the surface until it is smooth to the touch. I sanded the entire table even though some areas showed no signs of damage. The areas with deeper scratches required a second pass with the sanding brick. It would be faster to use a power sander, but I don’t own one.
If you have deep gouges in your furniture, apply wood putty to fill in the crevice before you sand.
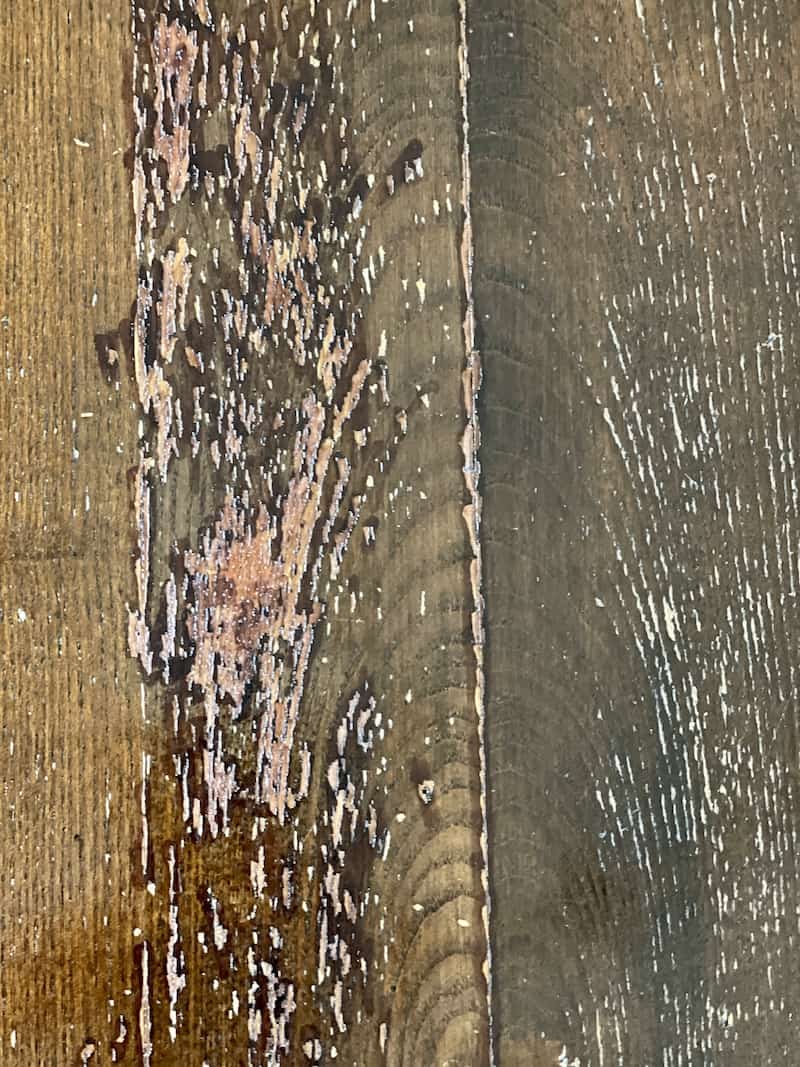
Step 2 – Clean the surface – Wipe the table clean with a soft cloth to remove all of the dust. If you need to use a wet cloth to get all of the sand off l let it dry completely.
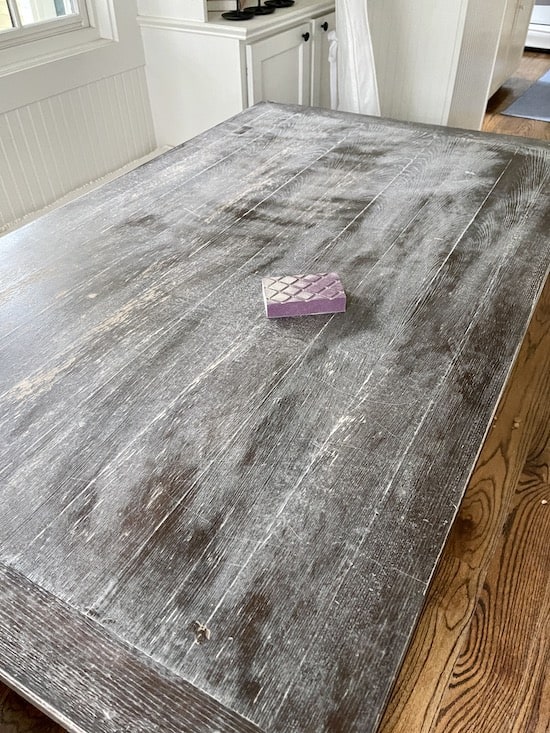
Step 3 – Stain – Matching the original wood finish can be tricky. Test a small area to make sure it’s close enough to the original color before you do the whole thing. If you sand the entire piece of furniture an exact match is not as critical because you’ll be restaining everything. For my table, I didn’t sand the legs, but I prepped the entire top.f a difference.
Pro Tips for Applying Stain:
- Use a paper plate to hold the stain while you apply it.
- Stain is easy to apply with a foam brush. Apply a thin coat of stain. Don’t try to apply it like you would paint.
- For best results, apply the stain with the grain of the wood and not across it.
- Before the stain dries use a clean cloth to remove the excess stain. Use a clean rag and rub in the direction of the grain. You will see small places that have a darker color where you’ve applied too much and it’s sitting on top of the wood.
I experimented with using both Varathan Stain and Howard’s Restore and Finish. There was no difference, so choose the one that matches your old furniture better.
I repeated this process on day two with one exception, I didn’t sand the entire table. I only sanded the spots that had the most damage.
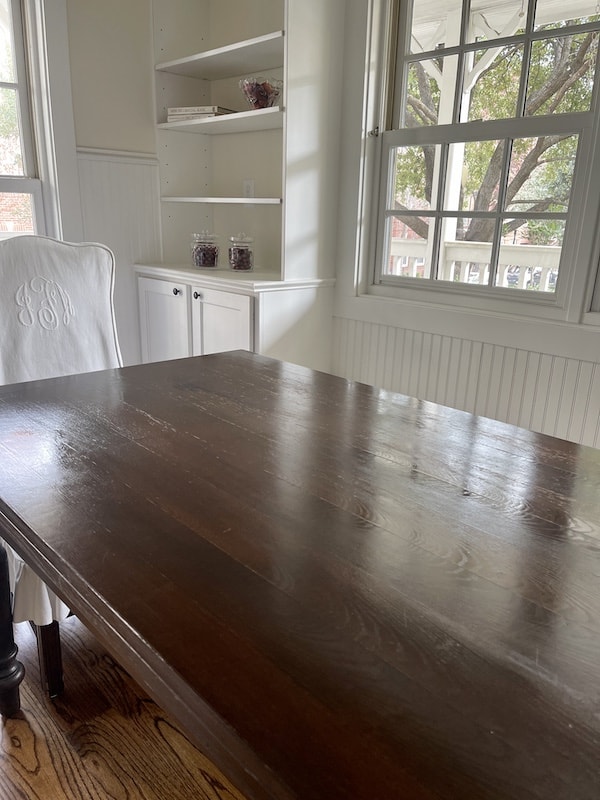
Here is the table on day two. You CAN still see some of the damage, but it looks 200% better.
How Much Time Does It Take To Refinish a Table?
If you add up all of the time I spent, including two trips to Home Depot, it probably took about 3 hours spread over two days. I think it was time well spent. Let’s have a look at some of the other table projects.
I said at the start of the project that I didn’t have enough time to strip this table but I wanted it to have a new look.
The total time required to sand and stain, including two trips to Home Depot, was about 3 hours. The time was spread out over two days. For a very small investment (around $30 in materials) I think it was time well spent.
If you have something in your garage that needs new life, give it a try.


Oh my goodness, it looks lovely Andrea! I have some furniture I need to do this too. Thanks for sharing and wonderful hopping with you!
Andrea, I had no idea that you could restore a table without stripping it first. Your dining room is gorgeous, and your “new” table is perfect in there.
Happy New Year,
Kippi
I can’t believe how simple it was to transform the table into an amazing piece Andrea. Even I could do this! You have inspired me to try my hand at working on a table that I didn’t think I could save. Thanks for sharing. It is always so fun hopping with you and the other talented ladies.
Andrea, I LOVE projects like this where you get a big pay out for not a lot of effort! The results are amazing!
Fun hopping with you again!
Niky @ The House on Silverado
Your table turned out absolutely gorgeous, what a difference! Its great hopping with you, I hope you had a good new year!
This turned out great, Andrea! I love how easy stain is and what a difference in can make in a piece of furniture or decor piece. Definitely a worthwhile use of your time. 🙂 Thanks for sharing!
I love your newsletter and especially love the do it yourself ideas! already can’t wait to get started on some, Thank you!
Thanks Kathy! I love hearing this. 😁