DIY Built In Bookshelf Part 3
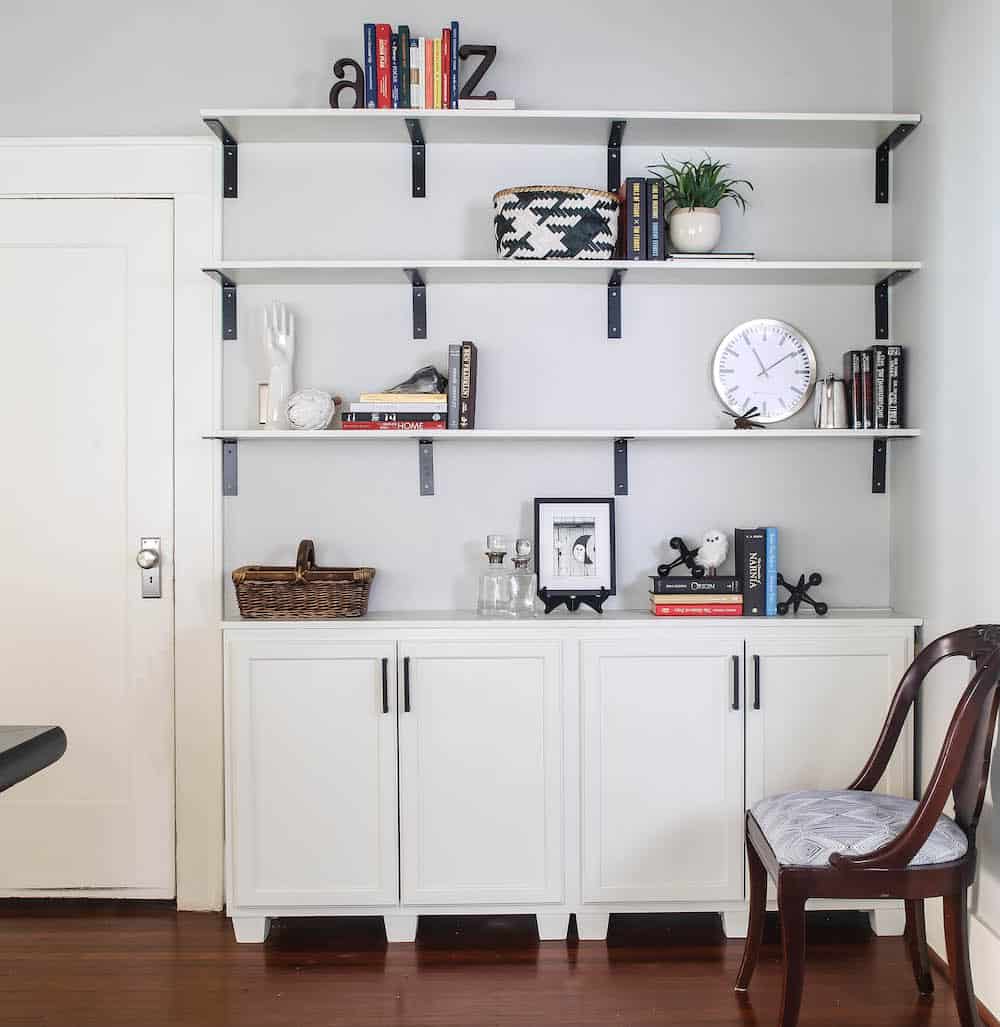
This is the final installment of the built in bookshelves that you have seen in Part 1 and Part 2. In this final part I will share the steps we took to install open shelves above our base cabinets, which is a departure from the original plan in Part 1.
I had originally wanted to build in shelves on top of the base cabinets but I decided to go with something more open (and easy). Installing the base cabinets took more time than I expected and to be honest I didn’t have the days to devote to building bookshelves.

If you have plans to install open shelving, this part of the DIY book shelf series is for you.
Materials needed for open shelving
- Measuring tape
- Primer – I used Zinsser Bulls Eye Primer from Home Depot
- Paint – I used Sherwin Williams Pro Classic Eggshell
- Large level
- Hinges
- Wood Shelves – I bought pre-primed 8×11.87×1″ shelves
- Strap Toggle mounting brackets
- Drill and drill bit to fit the mounting brackets
I shopped for some heavy duty iron hinges on Amazon and Etsy. I ended up going with these brackets from CsonkasCustomRustics.

This seller has 1600 great reviews and you can choose the length and width that fits your needs. I didn’t want the brackets where the shelf has to fit up inside of a lip on the front.
Installation Process For Open Shelves
The steps after I had my supplies were pretty straight forward.
Prime and Paint Shelves – Before I even cut the shelves to the right length (because I don’t own a saw) I primed and painted the shelves on both sides. I thought this would be easier than painting them on the wall. The Sherwin Williams paint I used had no odor, so I painted the shelves inside (with it being 100 degrees here).

Find Studs and Electrical in Wall – Since these shelves are going to hold books they need to be pretty heavy duty. I really wanted to mount them in studs. I used a stud finder that also detects electrical wiring so I didn’t accidentally drill into anything electrical. I marked the studs on the wall because I knew I could touch up the paint later.
This meant that my brackets would not be spaced evenly because the studs aren’t even The ability to support anything I want to put on the shelves was more important than having even brackets.
Mark Level For Shelves – I decided I wanted to have the first shelf high enough where I could put a small lamp on the countertop of the base cabinets. From there I wanted the last shelf to be even with the door. Deciding how to space your shelves depends on what you will put on them.

Drill holes for Hardware – To give it extra support we decided to use the strap toggle mounting brackets. We thought we found studs in my walls but honestly there is wood behind all of my drywall so it’s hard to tell exactly where studs are. These bolts are used to hold TVs.
Cut Boards and Mount to brackets – The next step was to saw the painted boards to the correct length. Once they were cut they could be screwed to the brackets.
Touch Up Paint – I had to paint the ends of the boards after they were cut. I also touched up the walls to get rid of our markings.
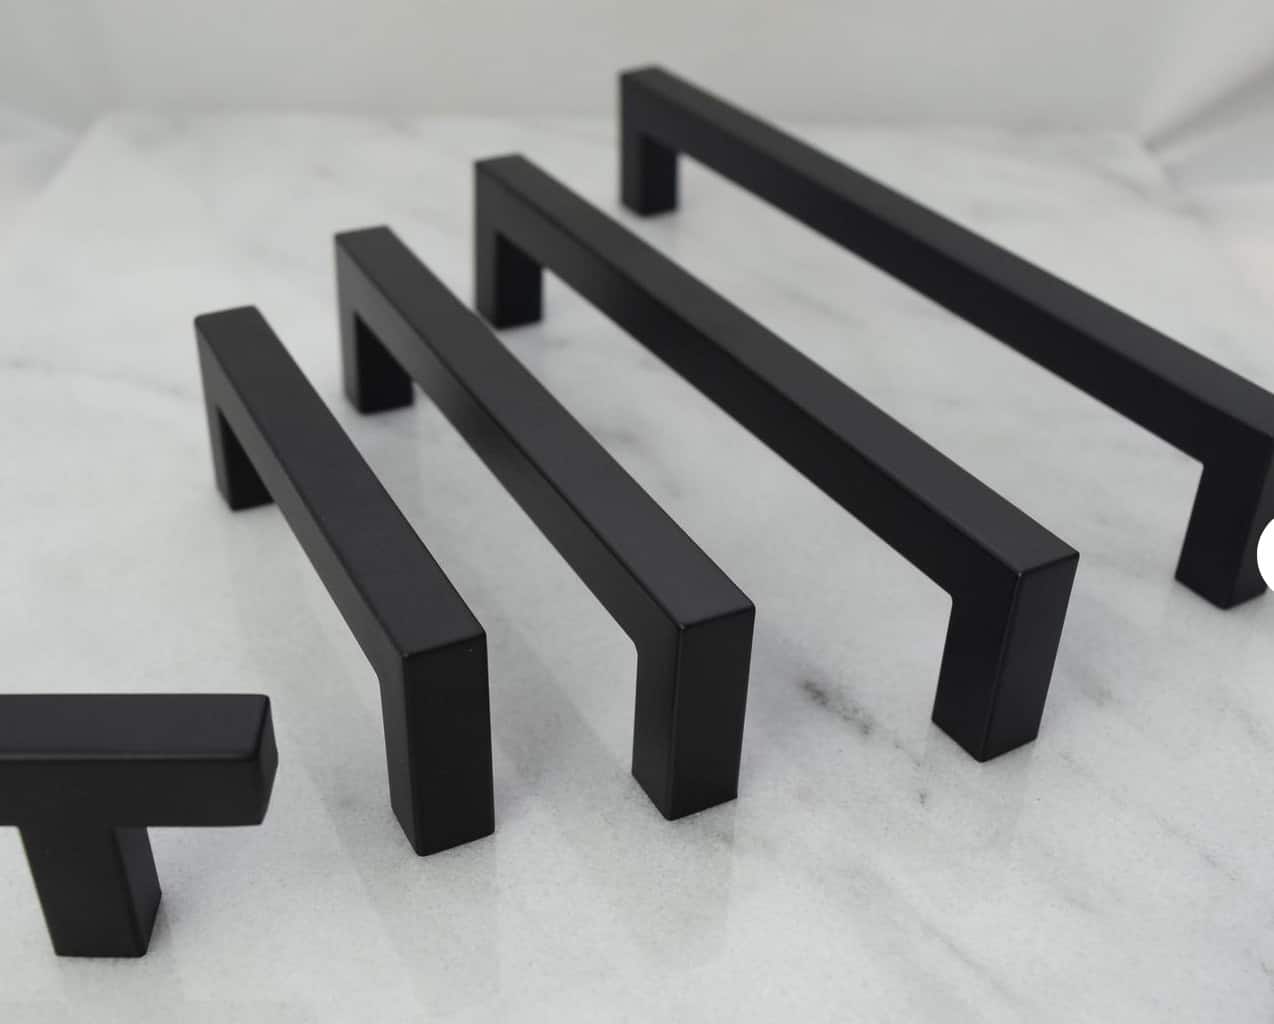
Add Hardware to Base Cabinets – You might notice that the lower cabinets now have hardware. You don’t have to have pulls, but I wanted something to tie them to the upper cabinets. I shopped on Etsy for cabinet pulls and ended up going with pulls from HookandKnob. They had 1500 good reviews and the pulls came in all different sizes.
These steps sound easy, but this process took us the better part of a day. If you plan a project like this don’t be discouraged if it takes days to complete.
Budget update for the project
If you recall, I had a start on the budget through Part 2 but this is the final wrap up. The project came in at $1938. I consider this a victory since I got two bids (not for exactly the same product) but one was for $5,000 and one was for $9,000.
- $486 – wall cabinets plus delivery
- $24 – side panels
- $330 – labor
- $199 – wood feet
- $48- primed 1×12
- $40 – Sander, I bought the Ryobi sander with the vacuum which really works
- $63 – paint (Sherwin Williams)
- $5 – Short paint brush, good for getting into cracks and trim
- $6 – Foam Rollers
- $23 – Primer (more than enough for more projects)
- $107 – Primed shelves – 8 foot x 1 x 12
- $56 – Hardware – pulls from Etsy
- $331 – Hardware Hinges from Etsy
- $220 – Labor
Conclusion
This is my first big semi-DIY project and I’m happy with how it turned out. It is not exactly what I started out imaging, but I’m excited to get started with decorating my built ins. I’m also excited that my DIY built ins were so much cheaper than the carpenter bids I got. It did take about two full days to complete them, but that’s worth a few thousand dollars to me.