Quick and Easy DIY Envelope Pillow Cover For Beginners
Do you like throw pillows? But maybe you don’t want to invest a lot of money to have new pillows for every season. Here is an inexpensive way to make easy envelope pillow covers. These envelope pillows are simple enough for even the beginner.
The beauty of this type of cover is that there is no closure (zipper, button or velcro) which makes sewing them VERY easy. They still look completely covered, it just takes a bit more scrunching to get the pillow form inside the packet/envelope.

This is an easy way to make new throw pillows to complement your home decor and they can be adapted for different seasons. They would also make a great gift. This project doesn’t require any sewing skills beyond sewing straight lines with your sewing machine. It’s an easy project for beginners. Keep reading to see my envelope pillow case guide for a 20-inch throw pillow, which can be adapted for any size pillow insert (pillow insert size guide).
Easy Envelope Pillow Cover Tutorial
Step 1 – Choose Fabric – If you are looking to buy great fabric online, check out this guide by type of fabric. FYI if you are using 100% cotton fabric you will want to throw it in the washing machine and fully dry the fabric as well, to pre-shrink. This way the new pillow covers ultimately fit the size of your pillow when you wash them.
Step 2 – Decide the size of your finished cover. I’m making a 20-inch pillow cover in this example, but you can adapt the formula to any pillow size and shape.
Step 3 – Cut Fabric – Cut your fabric according to this formula:
- Width = Width of the pillow. 20 inches
- Length = Length of your pillow x 2 plus 5. 45 inches

In my example, I want a piece of fabric that is 20 inches wide x 45 inches in length. If your fabric has a pattern and your pillow is not square, be sure you get the fabric’s pattern in the right direction. It’s pretty easy with a square pillow because you can flip it any way, but if you’re making a rectangle you might not want the flowers to go sideways.
Step 4 – Add Double-fold Hem to Long Side – Iron over a 1-inch hem on BOTH the long sides. Turn the raw edges in so that you have 1/2 inch, press, and pin. See the photos.


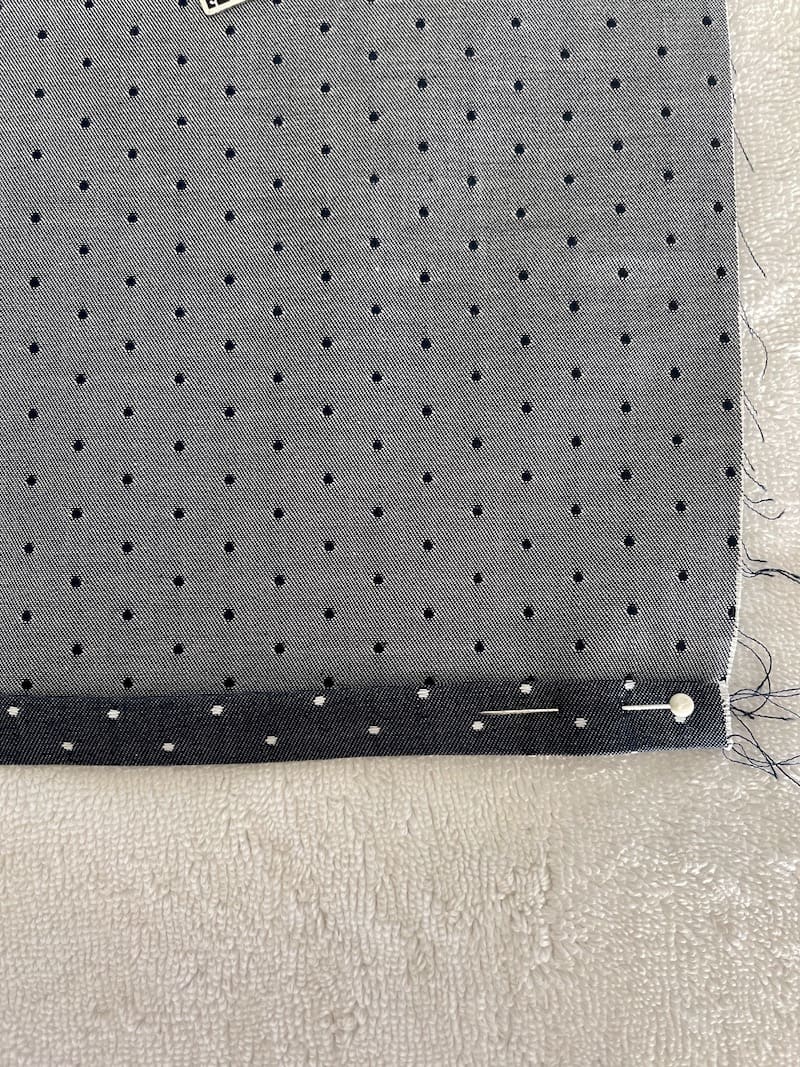

Sew Hem with a straight seam.
Step 5 – Mark Center – Lay your fabric out with the two hemmed edges on the left and right side. Be sure that the right side of the fabric faces down, the wrong side of the fabric will be facing up. Mark the middle with a pin.
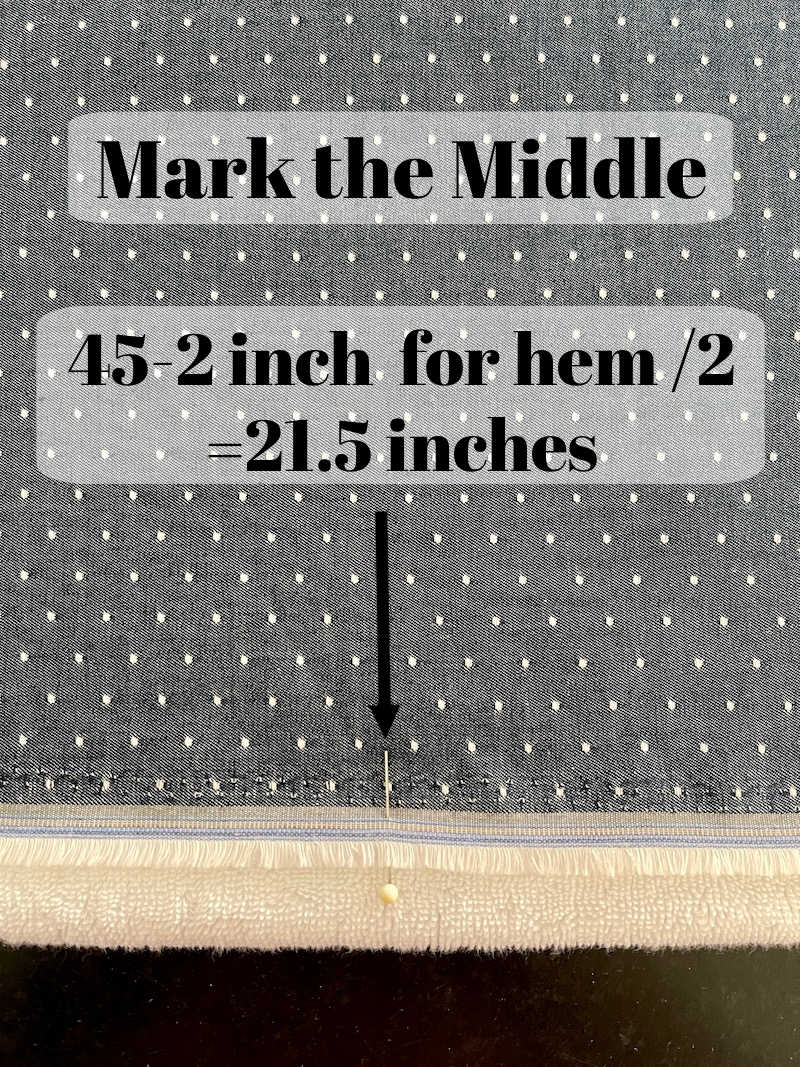
Step 6 – Fold Each End In and Pin – Fold each hemmed edge in toward the middle. Use the formula below to decide how far to fold. Make sure the hemmed sides overlap the middle pin. The distance from the middle to the side edge should be:
(cover size divided/ 2 )- 1/2 – For my 20″ pillow this is 20/2 = 10 – 1/5 = 9.5 inches

Pin the folded sides together so they are ready for sewing.

Step 7 – Sew Folded Edge – Sew along both folded and pinned edges.
Step 8 – Turn Envelope Pillowcase to the Right Side – Now that both sides are sewn flip the pillow cover to the right side and it’s ready to stuff.

The entire cutting, pinning and sewing process takes about 30 minutes for one pillow. At the end, you have a custom pillow cover that you can easily remove and wash. These simple envelope pillow covers are a really great project for beginners like me. It’s quick and satisfying to make your own pillow covers and you only need to be able to sew a few seams.
If you’re struggling to choose new fabric for your throw pillow covers, read this Guide to Choosing Throw Pillows that Coordinate.


